The Pico Balloon concept is simple: you build a transmitter small enough to be carried around by one or two common party balloons. As the transmitter floats around the globe it transmits its current position and altitude so you can follow its path in realtime. If you do it right, the balloon will circumnavigate the globe… repeatedly. Great stuff! I had to do it.
After realizing that it was relatively easy to construct a WSPR beacon based on Arduino and a clock generator, a few months back I decided to try building one.
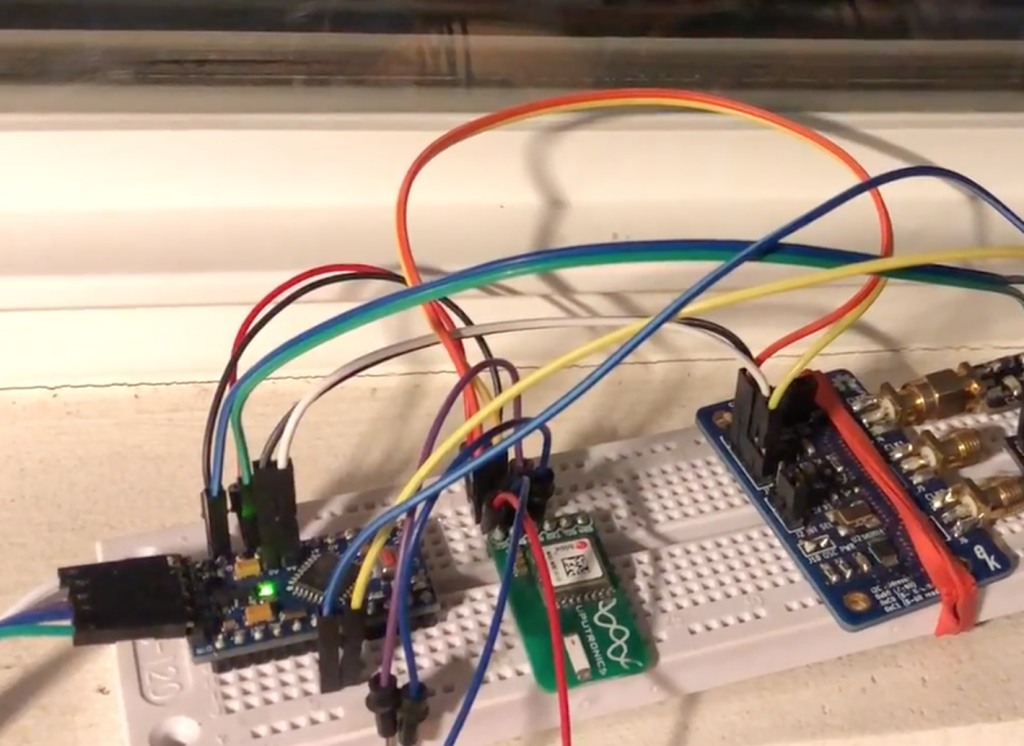
The first attempt was on a breadboard with an Arduino Pro Mini, a uBlox breakout board and the Etherkit s5351a breakout board. After writing a few hacky lines of code (WSPR libraries are already available) WSPR worked! All I needed was making everything small enough to be carried by a party balloon.
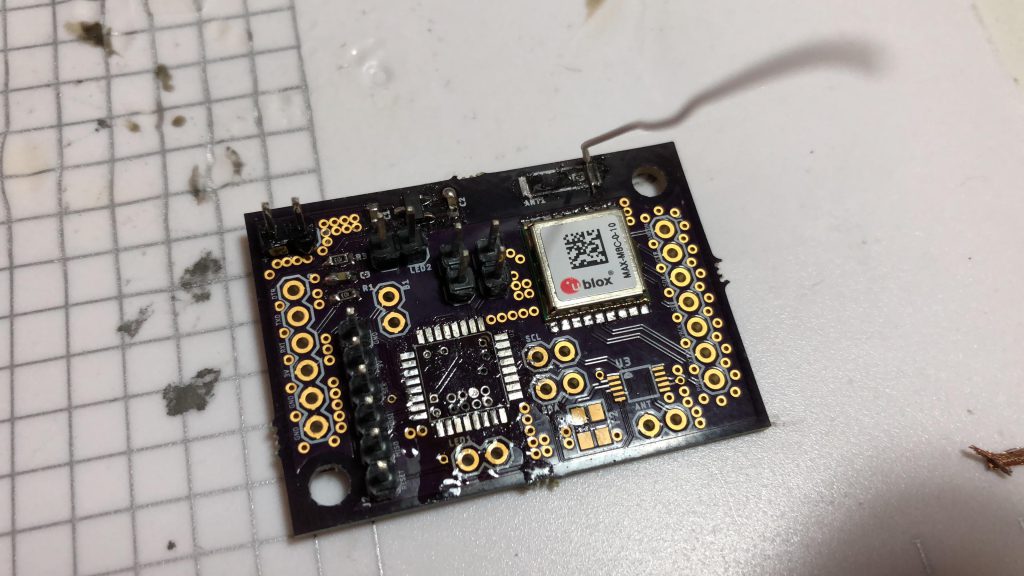
I decided I was not going to use the standard Arduino Pro Mini. Rather, I was going to load the Arduino boot loader on a ATM328P myself and have everything else (GPS + Clock Generator) on a the same board.
This unit also worked and, technically, was already small enough to be carried around by a couple of large balloons.
But how was I going to power it? Was a small LiPo battery suitable? After checking the specs I realized that even the smallest ones were too heavy. On top of that, batteries don’t take extremely low temperatures well so it definitely had to be solar power.
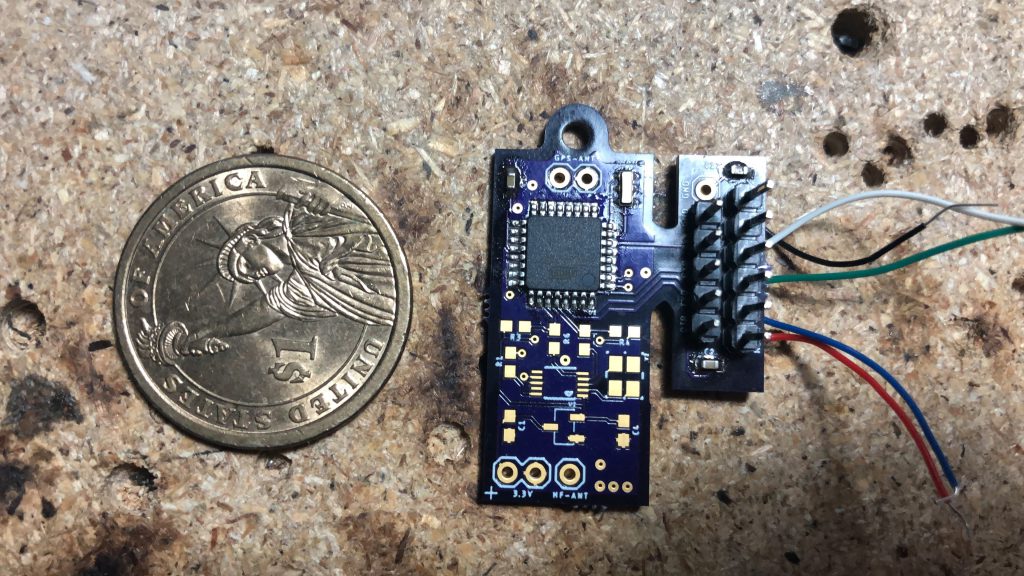
In the next revision, which I called 1.1, is where I faced the first serious obstacle. Until that point I was able to successfully load the Arduino boot loader without too much trouble using an ancient Arduino Uno as the ISP programmer. For reasons I still can’t understand, that wasn’t the case anymore with revision 1.1. Fortunately, when I was close to giving up, I remembered that back in the days I had purchased a proper ISP board and tried with that: Bingo! Problem solved.
As you can see, on version 1.1 all necessary programming connections have been moved to a section of the PCB which is supposed to be cut out before launch (the wires soldered on the side were part of my desperate attempts to troubleshoot the ISP malfunction…).
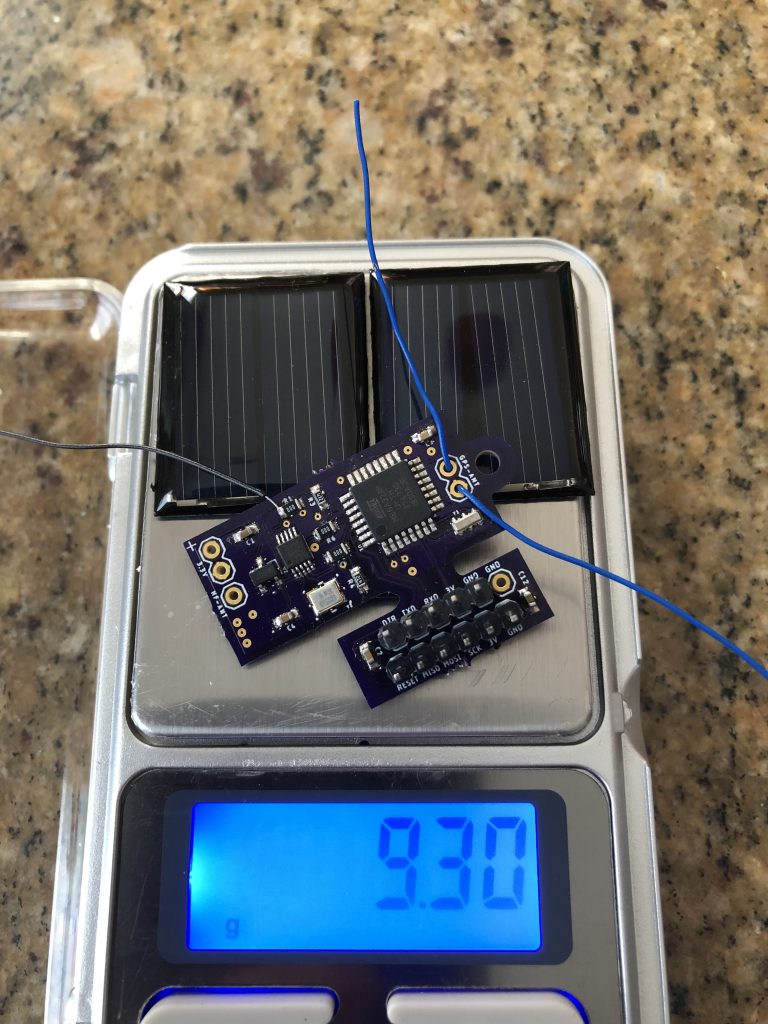
At this point I had a transmitter that – together with the solar panels – weighted less than 10 grams! I really believed it was just about time to buy the balloons when I faced the second problem: I had grossly overestimated how much power solar cells can deliver. Yes, tensions can be pretty high but currents… well, currents are tiny: there is absolutely no way the beacon can be carried around by small balloons while being directly powered from solar panels as I originally envisioned. I needed something light that charged a capacitor and then – only then – I could start transmitting.
By searching things like “Tiny Solar Power Charger” I ended up on Jared’s (N7SMI) page. I was stunned: his pico balloon concept and hardware was identical to mine except that he completed it years in advance and, unlike mine, his actually worked and flew already many times.
Jared had already solved the power issue with a 1.5F super capacitor charged by an SPV1040 controller and two 0.5V solar cells. Brilliant!
Not only that. In order to save power, he provisioned his transmitter to selectively switch off the GPS and/or the clock generator. He also has a temperature sensor and – surprise surprise – a CW beacon too!
Clearly, I now have enough material for version 1.2.
On part two I will publish my current schematics, PCBs and source code.